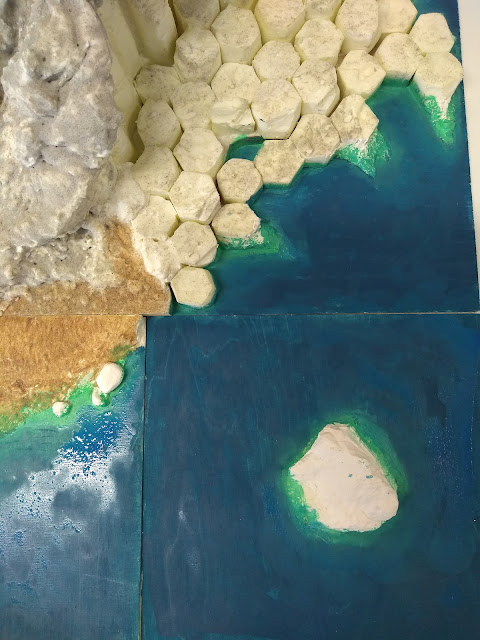
Wotcha everyone. I have been cracking on with my demo game board. Having carefully planned what order I was going to do things in I immediately forgot and painted the water first.
The rocks were a good opportunity to try out the new airbrush setup. I first sprayed everything matt black, paying careful attention to the cave mouth and deepest recesses. I oversprayed this with a patchy raw sienna mix and a general grey, not worrying much about colour but trying to give a good overall coverage and pick out some of the main forms. I was worried this was a bit too purple so when it came to drybrushing highlights over I mixed the light grey with some yellow. This has helped bring the colour more neutral. I did a vigorous drysbrush over the whole thing with a mid grey, then a more targeted, lighter drybrush with pure white and a tad of yellow. Only looking to generate contrast in my tones at this point, not overly bothered about colouration. I drybrushed the rock pillars closest to the shoreline more heavily as on the photo reference I have these are lighter in colour.
To soften the drubrushing and add colour into the rocks I diluted some raw sienna and burnt umber with flow aid and dappled it in patches over the surface. I also did this with the black to knock back any areas which came up too colourful and reiterate cracks and shadows. I haven't used the flow aid (4011 Reducer) before, having just stuck with water in the past. The 4011 did make quite a difference, not running/dripping so much and drying faster so I could control the placement better. I was only using cheapy craft acrylics so thought the pigments might not dilute into a wash well, but was pleasantly surprised.
Speaking of which... here are my dams (thick, melamine-faced MDF which I have also covered in sellotape for a definitely easy-peel, shiny surface) in place and the resin (Easy Composites GlassCast 10) poured. So far so good... more on that in the next post.


Moving along at a nice pace and looking great too ^_^
ReplyDeleteLooking good. And interesting to see this project progress
ReplyDeleteReally excellent: we already envy those who find themselves playing on your game board! And then your post is full of techniques and products that we could put to use, given the results.
ReplyDeleteWow - it's looking stunning and really natural thanks to your painting - but it's giving me ideas for large scale scenery projects I definitely don't have the room for after the shrine!
ReplyDeleteStorage? What is this storage of which you speak? I definitely don't know where I am putting this after Salute...
Delete