blog header

blog header
Showing posts with label Thunder under Mount Silence. Show all posts

Friday, 6 January 2017

Terrain making at glacial pace...


My ambitious plan (at least, one of them!) over the Christmas break was a 4x8' modular board based on the Frugelhorn Valley from Terror of the Lichemaster. I managed to get it all carved out in the quiet workshops before going on leave. Here is it with the map for reference:


Of course, it's not 'to scale', the idea is to have a board that will give an overview of the whole valley and can be reconfigured into different 4x4', 6x4' and even 8x4' layouts to represent each of the locations more completely. Unfortunately I don't have anywhere at home big enough to lay all of it out and work on everything at once, especially with the temperature of the shed making it unusable. That meant I could work on two modules at a time in the studio, four at a push. Nevertheless, the first 4x4' of terrain is definitely usable now and should get on the table at the nest The Woods demo game on Thursday. Here are some more pics:


Crude bridge over the cascading rapids in the heart of the glacier. The ice on the glacier is painted polystyrene covered in three thick layers of Liquitex Gloss Gel. Each layer took about 3 days to dry clear! The slush on the floor of the channels is Christmas decoration 'snow' and glitter with a thick layer of Liquitex over the top.


The glacial river flows out of into the river. There'll be a glacial lake board eventually too.


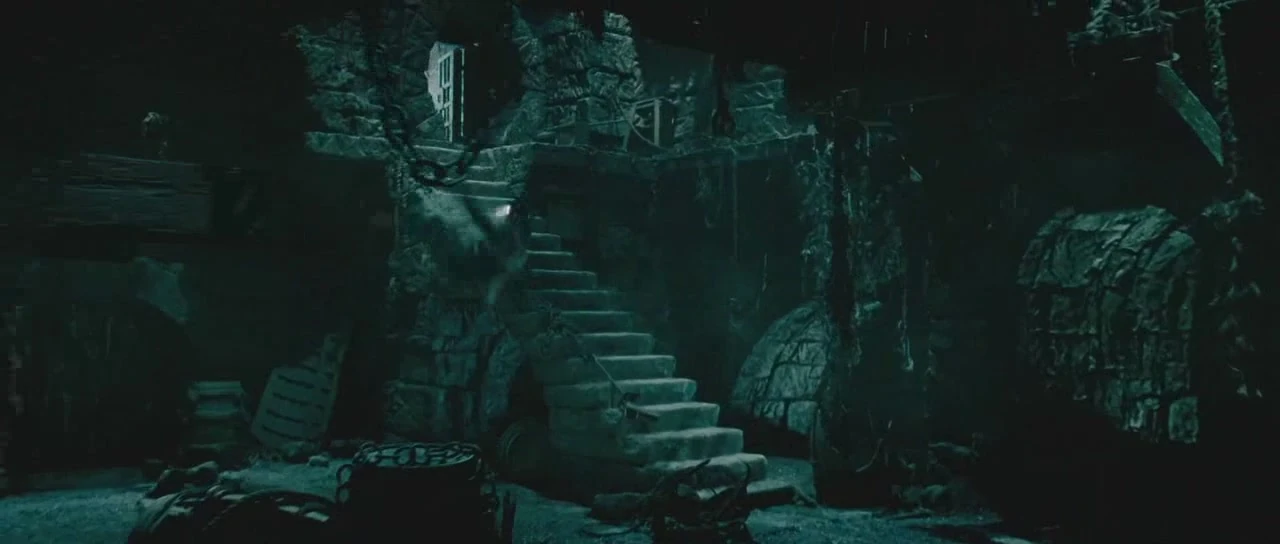
A creepy doorway leads into the ice... what horrors lie within? In The Woods games next week this will be a portal to the Void, in the Lichemaster campaign I see this as the entrance to Krell's tomb. The doorway is from an RAFM Liche (sold in the UK by Oakbound).


Kemler makes his way across the frozen valley... The river is a painted base, lighlty tinted epoxy resin and three layers of Mod Podge. Clear silicone used to make more aggressive breaking water where the river is narrower, moving fast through the glacier and breaking against rocks. I wanted to give a sense of movement without definite direction on the flat boards so they can sit either way around. It means the rapids aren't quite as realistic as they could be, but worth it for the versatility. The crests are tipped with white silicone. I really liked the look of the river at each step and adding the next layer was nail-biting, but ultimately worth it I think!


This bridge is carved Styrofoam, held in place with cocktail sticks and milliput. I need to touch in where one of the sticks pushed through the surface, and give the whole thing a coat of PVA to protect it.


Zombie Dragon stalks the wilderness... Trees were commercially bought, and some are definitely better than others. I went a bit overboard buying different types to see what was out there, but the mixed look that results is pleasing. Edges of the 'dirt' areas need a bit more feathering with powdery snow.


More water.


Next up, basing skeletons, Grimbrin's mine and the glacier lake.
Share/Bookmark

Monday, 5 September 2016

Shelving, doors and a big hole in the floor!

 Over the weekend I managed to crack on with some of the dungeon rooms.


The library is now almost finished, apart from finishing off the stone work, putting the fire and chimney in the inner sanctum and picking out a few more coloured books.


The staircase was a pain in the backside to assemble and the cause of much swearing and cursing! It seemed once it got beyond about 40mm high any further layers just wouldn't stick. In the end I used superglue rather than pva to finish it and once it was in place liberally coated the pillar with glue. It seems to have held. 


The edges of the floor and the balcony I washed with woodstain to darken them. There's a doorway hidden in the top left, but will the adventurers notice it in the gloomy corner of the library?


Here's a shot with the removable side panel attached. I've yet to paint the big doorway and add the free-standing shelves to either side of it.


Next up, the ramparts/courtyard. The idea is to have an open space to serve either as an entrance/exit from the dungeon or so adventurers can get their bearings in the labyrinthine tunnels. Lots of barrels and sacks strewn across here, a trough and a well for water as well as numerous doorways leading back into the caverns.


The walls were coated in PVA, had lots of cat litter pressed onto them and then a coating of paint and PVA to seal them before drybrushing. The floor still needs some washing, drybrushing and piles of scatter/gravel across it to break up the surface. I liked the bobbled polystyrene texture, so haven't disguised it with a textured paint, but it does need varying across this sized area.
 
 
Spraying some resin cast doorways.


And the next big room. The idea for this one is an underground lake or cistern. I started off by applying my resin cast tiles to the areas in front of the doorways, giving the impression of the remains of a richly tiled room.


Around these I painted pva and applied liberal amounts of sand, this would form the boundary of the lake area.

 
Next I sprayed the exposed polystyrene in the centre with black primer, melting it away.


The trick is not to spray so much it eats right through the styrene! Once I was happy with the amount that had been dissolved I mixed some paint and PVA and painted a base colour onto the bed of the lake. This seals the polystyrene to prevent the resin I would pour into it from further eating away the surface (and then pouring out all over the workbench!) Once this was dry I mixed up my clear resin and poured it up to the level of the sand. Then I checked it a few hours later before going to bed, all looked level and clear and not eating away the styrene, all good.

This morning, when I checked, I saw disaster had struck overnight! Instead of a nice, clear lake I had a foamy mass of bubbles! Rock-hard bubblebath foam! Ah... The material I had left in the pot to test curing without touching the pour had set just fine, so it wasn't a problem with the resin, ambient temperature or moisture level. I think what must have happened is that as the resin cured its exothermic reaction caused the styrene to emit gas, which managed to get through the layers of paint and glue and bubble up through the resin. Not the effect I was looking for! I did have an idea on the way into work this morning however, I'll have to have another look when I get home. It might be that this unexpected issue has prompted a whole new aspect to the relationship between the gnomes and goblins who live in this mountain!
 
 
The door castings have been much more successful. The dark strip on these is where I have poured resin with an iron filler powder into the mould. This is magnetic (see small magnet stuck to left door) and with magnets set into the door frames on the dungeon boards this will provide my magical hinge solution. Now I just need to order a shed load more magnets!
Share/Bookmark

Wednesday, 24 August 2016

Going underground... underworld style

I recently heard news that an Underworld 5 is in the offing... hoping for a return to form after the dismal 4th film the wife and I had an Underworld marathon of the original trilogy at the weekend and I came out of it really wanting to create some terrain that's a blend of William's prison from the 2nd film and the vampire castle from the 3rd.


There's been a lot of talk around me about dungeons at the moment. After BOYL on the drive home Harry, Chris and I were discussing a dungeon bask project for next year. Then Harry's Twisting Catacombs stuff turned up (mine's still not here, boo), then Maki Games announced an imminent revival of their Modular Underground project.


With the release of 'Secrets' thoughts have turned to the next sourcebook instalment for The Woods. This will take the action to the conflict between the Gnomes and Goblins in the mountains, working title "Thunder under Mount Silence". Obviously I'm going to need some underground terrain for playtesting and photography.


We lately took delivery of a new bandsaw at work which came in an elaborate and large polystyrene box, with lots of dungeon features...

With all this happening and a few weeks of quiet summer left it would be very rude not to do something about it don't you think?

 
What you're looking at here is the bandsaw box chopped into chunks and surrounded with MDF (which I laser-engraved with a nice Oakbound logo for when we take it to shows). There are 8 modules measuring 45cm by 22.5cm each, giving a 3' square dungeon. Of course they can be arranged in rectangular or linear fashion as well. I figured a 3' square would be about as far as you'd want to lean to move figures. There's also a double-height section because the packing was too cool to chop up. This can add on, or displace one of the other modules which can then be stacked to give a second double-height section.
What's especially good about this size is that it means my modular board tiles which are swamp one side and cobbled the other will fit in nicely as they're 22.5cm wide and 66cm long (I can cope with the 15mm gap, might make some inserts).


The depth of each module is 12cm, with the floor depth varying between 4cm and 10cm. Now I've moaned about accessibility for play in dungeons with walls before and granted some of those areas are pretty tight. I've tried to keep as many open areas as possible and there will be lots of levels built in so the narrow spaces aren't as hard to reach. BUT I am a bit concerned about getting in to decorate, play and photograph so some of the MDF walls might be made removable once I've got the basic forms in place.


 After boxing everything up I decided what I wanted each room to be. Library, cistern, council chamber, lower gatehouse etc. Actually I have two libraries because I've wanted to do something like the library from Gormeghast for some time. I then marked in lots of doors, making sure there were some standard connections and plenty of options for the feature doors, matching them in as closely as possible with the layout of the polystyrene. One of the good things about having the thick walls and different levels in there is that it doesn't matter too much if doors shift along slightly, don't line up or seem to lead nowhere. The thickness of the wall means an unseen narrow corridor, stairway or cupboard can easily be claimed. 


For transport and storage these modules will stack together into a relatively tight 45cmx45cmx60cm block. I'll make a little trolley with some fixings on so it can be wheeled around for events and games at other people's houses.

 
Mad to start something else, especially something this big, with the planned undead army and lots of commission sculpting to get on with? Well sure, but anyone who knows me will tell you I'm never too busy to start another project... finishing, well, that's another matter. I still have a few books to bind...!


Share/Bookmark

Fimm McCool's

Fimm McCool's