blog header

blog header

Wednesday, 16 October 2019

All along the hedgerow...


One of the things that bothers me about modular scenery is how visible the joins can be, especially with straight edges. I've attempted to put extra flock along the sides of mine to blur the seams but with only limited success. I decided what I really needed was some hedgerows and ditches to bridge the joins and soften the straight lines. 


The base for these modules is 15mm thick MDF which sits between the two modules, ensuring that the hedgerows are fixed in place and giving me a deep area to carve ditches and plug trees into. To break up the resulting grid look I made the hedge modules different widths so that the base boards would become offset from one another.


Here's a photodump of the 11 modules I ended up building. Scroll on down for some close-ups and look at the materials used.


Here's a selection of the ground cover used on the modules. I've tried to mix up the textures a bit to give a wild look and indicate a wealth of different plants growing over the terrain. Because I was keen to crack on I haven't done a step-by-step photo guide but the basic process is as follows:

After shaping the base board and cutting any ditches with a router and dremel I applied a generous dose of readymix filler to each module. Plaster cast rocks from rock moulds, cat litter and resin casts of polystyrene stones I carved were set into this and more filler applied to blend them together.


The whole module was sprayed black, misted with a green spray then drybrushed with various greys and browns. Pigmented epoxy resin (I use Easy Compsites GlassCast) was poured into the ditches, then Woodland Scenics grasses were pushed into the wet resin to give clumps of reeds. A small amount of leaf litter was scattered onto the surface to suggest fallen leaves floating in the muddy water.


A base layer mix of black tea, green tea and coffee grounds was applied over the whole module, then a blend of Model Tree Shop foam scatters (C11, C5 and C6) were sprinkled on top. When dry the whole thing was given a liberal dose of diluted PVA. the sponge scatter soaks it up and dries solid whilst retaining its grassy look. I also sprinkled Model tree Shop static grass on whilst the dilute PVA was drying to give an additional texture and to provide shading around the hedgerows. The path areas and patches under trees were left bare of sponge scatter but had leaf litter (green tea mostly) and fine sand sprinkled on. A sparse sprinkling of pink and red flock (leftover from some cheap Chinese model trees...) gives an indication of flowers.
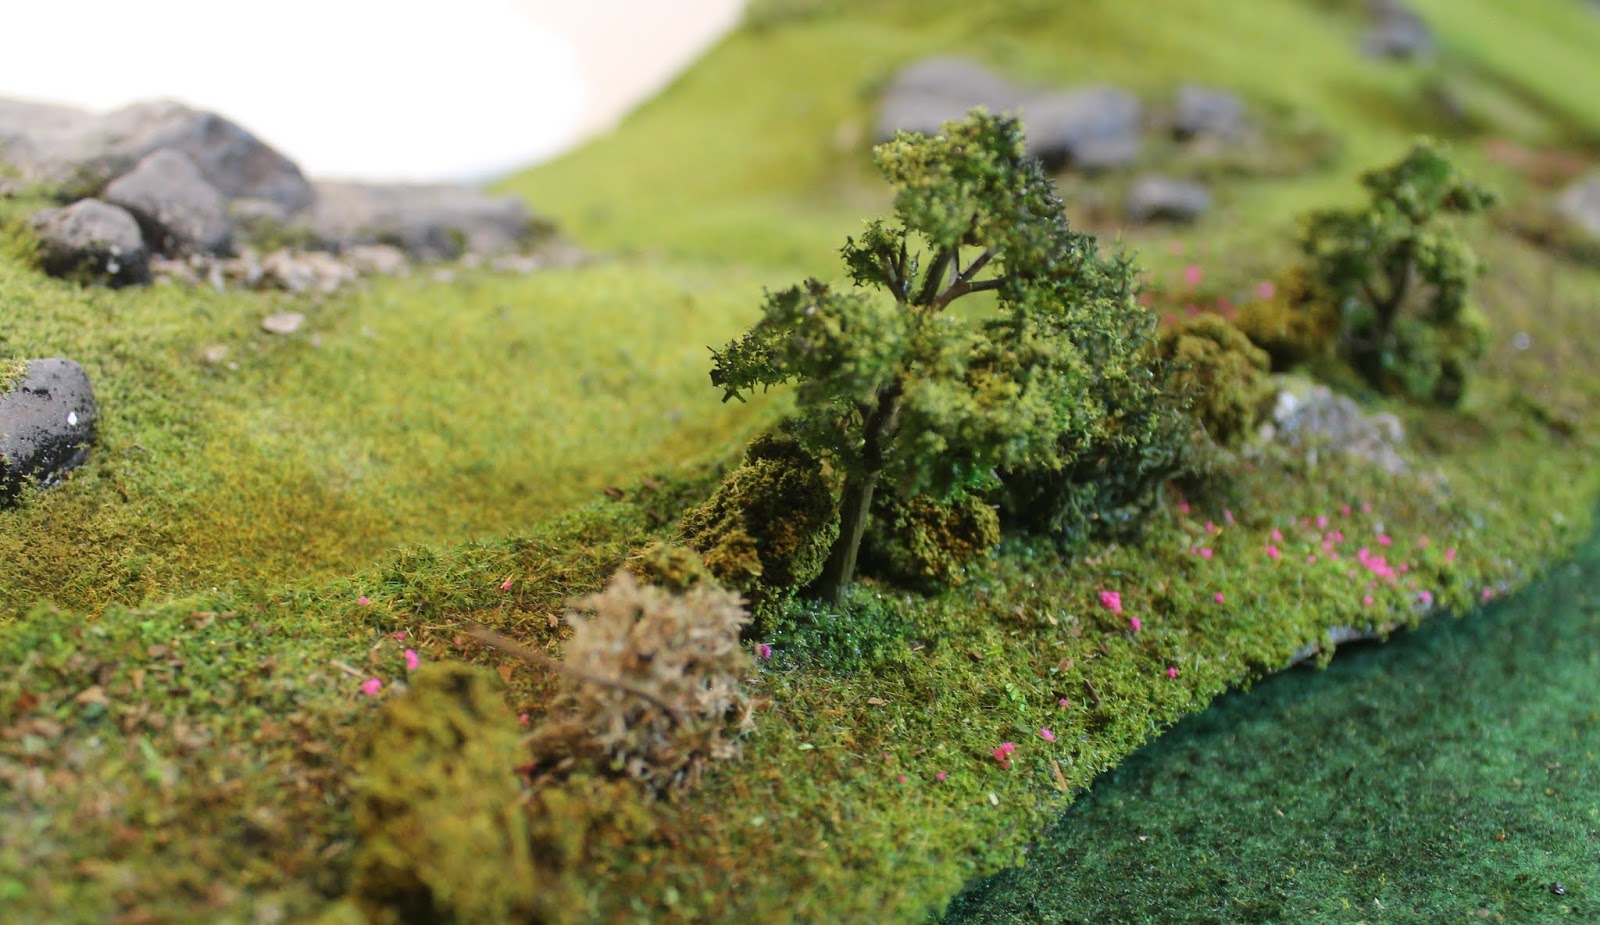

 The dry stone walls are resin casts of walls I built from fuller's earth cat litter.

The hurdle fencing was created from aluminium wire, brushed with readymix filler for texture.


The big trees are twisted wire, covered with a thick mix of powder filler, paint and PVA. The trunks were then drybrushed with greens and greys. The foliage is lichen glued in place with PVA, painted over with diluted PVA and sprinkled with first Model Tree Shop C11 medium sponge scatter (to give shadow) then more lightly with Model Tree Shop C15 fine sponge scatter highlights.


The hedgerows are a mix of lichen, Model Scenery Supplies lump foliage (similar to Woodland Scenics olive underbrush but more solid), Javis tree foliage (which has an excellent two-tone look giving shades and highlights all together) and cheap Chinese trees. With the trees I sprayed them with a dull green before attaching them (they were too garish before) and gave them the same highlight treatment as the big trees with PVA and Model Tree Shop C15 sponge scatter.


Hope that's helpful to somebody. I'll try and take (any!) more step-by-step photos next time and will get some pics of a full set up soon.

Lord of the Rings anybody?


Share/Bookmark

Tuesday, 8 October 2019

Exciting cartoon times ahead!

 
Familiar to anyone?
How about...?


If you were quite young in the 80s and 90s you may remember these guys from one of my favourite kids cartoons, The Dreamstone. Airing in 1990 and running for four series, The Dreamstone is one of those engrossing fantasy worlds with rich characters and dark undertones. The very first episode opens with Zordrak, the Lord of Nightmares (the big dragony bloke in the top picture) feeding the captain of his army to the monstrous Fraznats that live in a pit by his throne.

What really makes the cartoon stand out in my view is that it is really about the bad guys, specifically the officious Sergeant Blob and his reluctant wingmen Frizz and Nug. Forced by their giant master to undertake missions to steal the ever-desired Dreamstone from the cutesy land of dreams, their life is made dangerous by the half-baked inventions of mad genius Urpgor. The overriding feeling is that they'd all rather be fishing in the sea of despair and leaving the goody-goodies well alone.

Just over a yar ago I had the mad idea of sculpting a couple of these characters and sending them to Martin Gates, the director of the production company that created The Dreamstone. After a long period of waiting for companies on either side of the world to talk to each other (British production company, Canadian merchandising, German rights-holders...) I'm excited to say that this is now happening:


The next few months will see a lot of sculpting! The plan is to Kickstart (or other crowd-funder) the range in March and aim for a September release to coincide with the 30th anniversary. There'll also be a simple miniatures game to accompany it which will likely be a freebie for crowd-funder backers. I'll post updates here and on the Facebook page as I have them.
Share/Bookmark

Monday, 30 September 2019

Bob-a-job month


September has been "Paint A Bob" month on the Oldhammer Community Facebook page, or, as I like to call it "Bob-A-Job Month" (non-UK followers, this was a term used by Boy Scouts who used to have a "bob-a-job week" where they would do odd jobs for people and be paid £1 (1 bob) per job. I think inflation may have changed that now!). This is the second in a series of contests painting a model by a particular sculptor and then having the competition judged by the sculptor in question. The last one was "Make a Trish", this time it was the turn of Mr Bob Olley, undoubtedly the Marmite of the miniature sculpting world!
 
Look at this meanie, he's gonna mess you up.
 
 
It's hard not to spot a Bob Olley sculpt; the big head, the wealth of texture, the deviation from 'canon'... Bob certainly produces some unique creations.  I will confess I was not a fan of them, until I painted one. I have a general rule for what qualifies a good sculpt, one which I try to go by when pushing putty. That is: if you can't produce a decent tabletop-level result with a combination of base coat, wash and drybrush it is not a good gaming model. Anything with too many flat surfaces that requires expert-level blending and freehand work is fine for those painting at display level, but unless you are a master it will look terrible on the table.
 
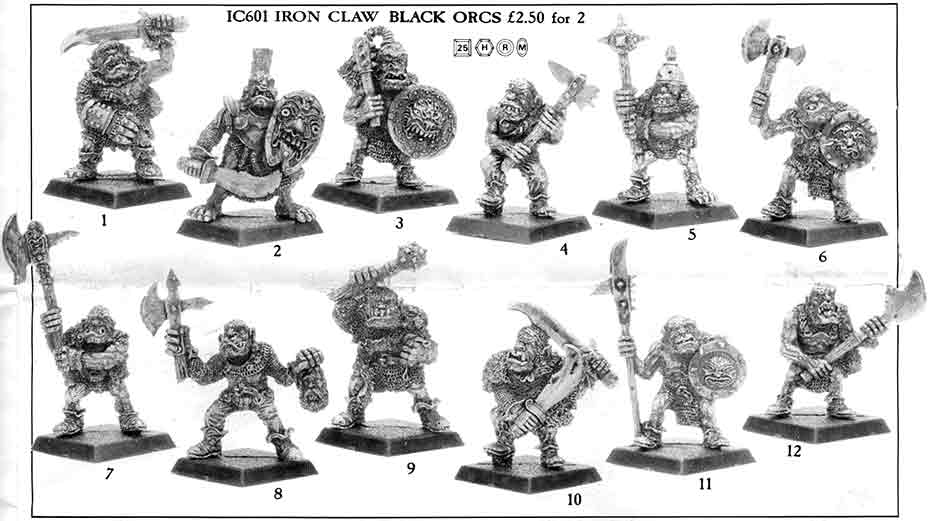
Bob's black orcs. I used to have a couple of these guys but I didn't like them and gave them away. What a fool I was!
 
 
Start painting a Bob and it will be clear he has a similar policy.
These are perfect sculpts for the pre-airbrush era where artists' inks are king. Put a drop of ink on a Bob Olley sculpt and all manner of strange and wonderful details will start to appear. Stuff you'd never notice from a catalogue page or bare metal miniatures is suddenly brought to vivid life. Put simply, to an average painter Bob Olley sculpts are pure gold, they'll make you look like a master with so little effort! I'm sure an amazing painter would bring our further magic from all those intricate bits.
 
Olley's Armies Scrunts- the biggest dwarves you will ever own!
 
 
A couple of years back I picked up a bunch of Essex undead cavalry for Bob's superb horses (that's another thing Bob does brilliantly- animals. Just look at his wonderful ork kangaroo!). Unfortunately the skeletons are one of the things I still can't bring myself to love, their big heads just don't fit with anything else I have in my undead army, but the horses are magic (and I'm pleased to see they now sell them separately). At the same time I picked up some gnarled old wizards and my first Bob-a-job entry is one of these.
 
 
His robe made me think Plains Indian so I've tried to up the shamanic elements as he summons his snakey servants. As someone who is petrified of snakes I was grateful for Bob's cartoony take on the blighters. I have a Tim Prow snakemen on my shelf which still makes me shudder if I forget it's there and catch sight of it. Just look at the expression in the face, the fierce eyebrows, the flared nostrils, the bad teeth! None of that is me, that is all Bob.
 
Because of the classic look of the mini and theme I decided to try and emulate a 'Heroes for Wargames' kinda look to the photo. Nice soft focus (not entirely deliberate).


My second entry is a more recent sculpt. A Bob Olley ogre from Ral Partha Europe. I picked up a dozen of these ogres a few years ago (see blog post) and really wanted this shaman to go with them. Unfortunately I had not recorded what paints and inks I used to do the tartan robes, so had to guess. I now keep records of the pallet used in any group I might want to add to later on! Fortunately I think I guessed right, or close enough that he works nicely with them.

So if you're a fan of a Bob sculpt I hope you enjoy these efforts. And if you aren't a fan of Marmite, um, Bob, perhaps try painting one? They're dead cheap from Essex and RPE. You might find you like it, or you might find you don't.
Share/Bookmark

Thursday, 5 September 2019

Intrigue in the courts of Annwyn


The next kickstarter for The Woods is rolling out next week. I managed to splash some paint around on holiday and now have all the initial figures done.


The idea was to take the venetian/renaissance aesthetic I'd set for the fae and use it to put out some figures that would have other uses in other places. I was fortunate enough to be able to pick up some lady pirates from Charlie Earl which have formed the bulk of the nobles (with addition of masks, variant poses and assembling them into single-piece castings). The fae martial I scaled to fit in with 4th ed Empire halberdiers which I'm told are curiously hard to come by. I'll almost certainly be getting a unit of them cast up for a certain birthday game.


The donkey-headed Hobyah (a-la Puck from midsummer Night's Dream) are dual-purpose. I've sculpted some axe heads which may supplied as separate pieces to make single or double-headed axes for them. In this form though they make up the bearers for a faerie palanquin which I'm hoping to get some paint on over the weekend.
Also in the sculpted but not cast pile are three faerie commanders which can either be mounted or on foot. The horses have been built onto the old sidhe horse that featured in the first Oakbound kickstarter. I'm toying with whether to have the commanders' torsos separate so they can be glued to standing or riding legs or whether to make up a full standing and riding figure for each option. I think probably the second, nobody likes having spare legs lying around.
 
 
There should be an article in the October Miniature Wargames magazine (out 13th September) discussing the use of fae in The Woods, with a scenario and look at the miniatures in the kickstarter.
 For anyone interested the kickstarter is going to officially launch on Saturday 14th after earlybird pledges open on Friday 13th. There's only one pledge level and essentially everything is an add-on so you can make up whatever combo you like. Earlybirds get you an extra 10% free to spend on miniatures. The campaign will run until Sunday 29th.


Share/Bookmark

Fimm McCool's

Fimm McCool's