
/pic338410.jpg)
You may remember that a few years back Boris Woloszyn was sculpting the Heroquest box art as a personal project. A lot of people in the Oldhammer community leaned on him and Diego Serrate stepped in to manage a very, very limited run of casts. Exactly what happened to the project is a matter of speculation and conjecture but it seems to have not been entirely smooth. Nevertheless I forked out the asking price (more than I care to admit!) for a set and duly received these excellent sculpts. What else to do with them but turn them into a diorama recreating the box art?

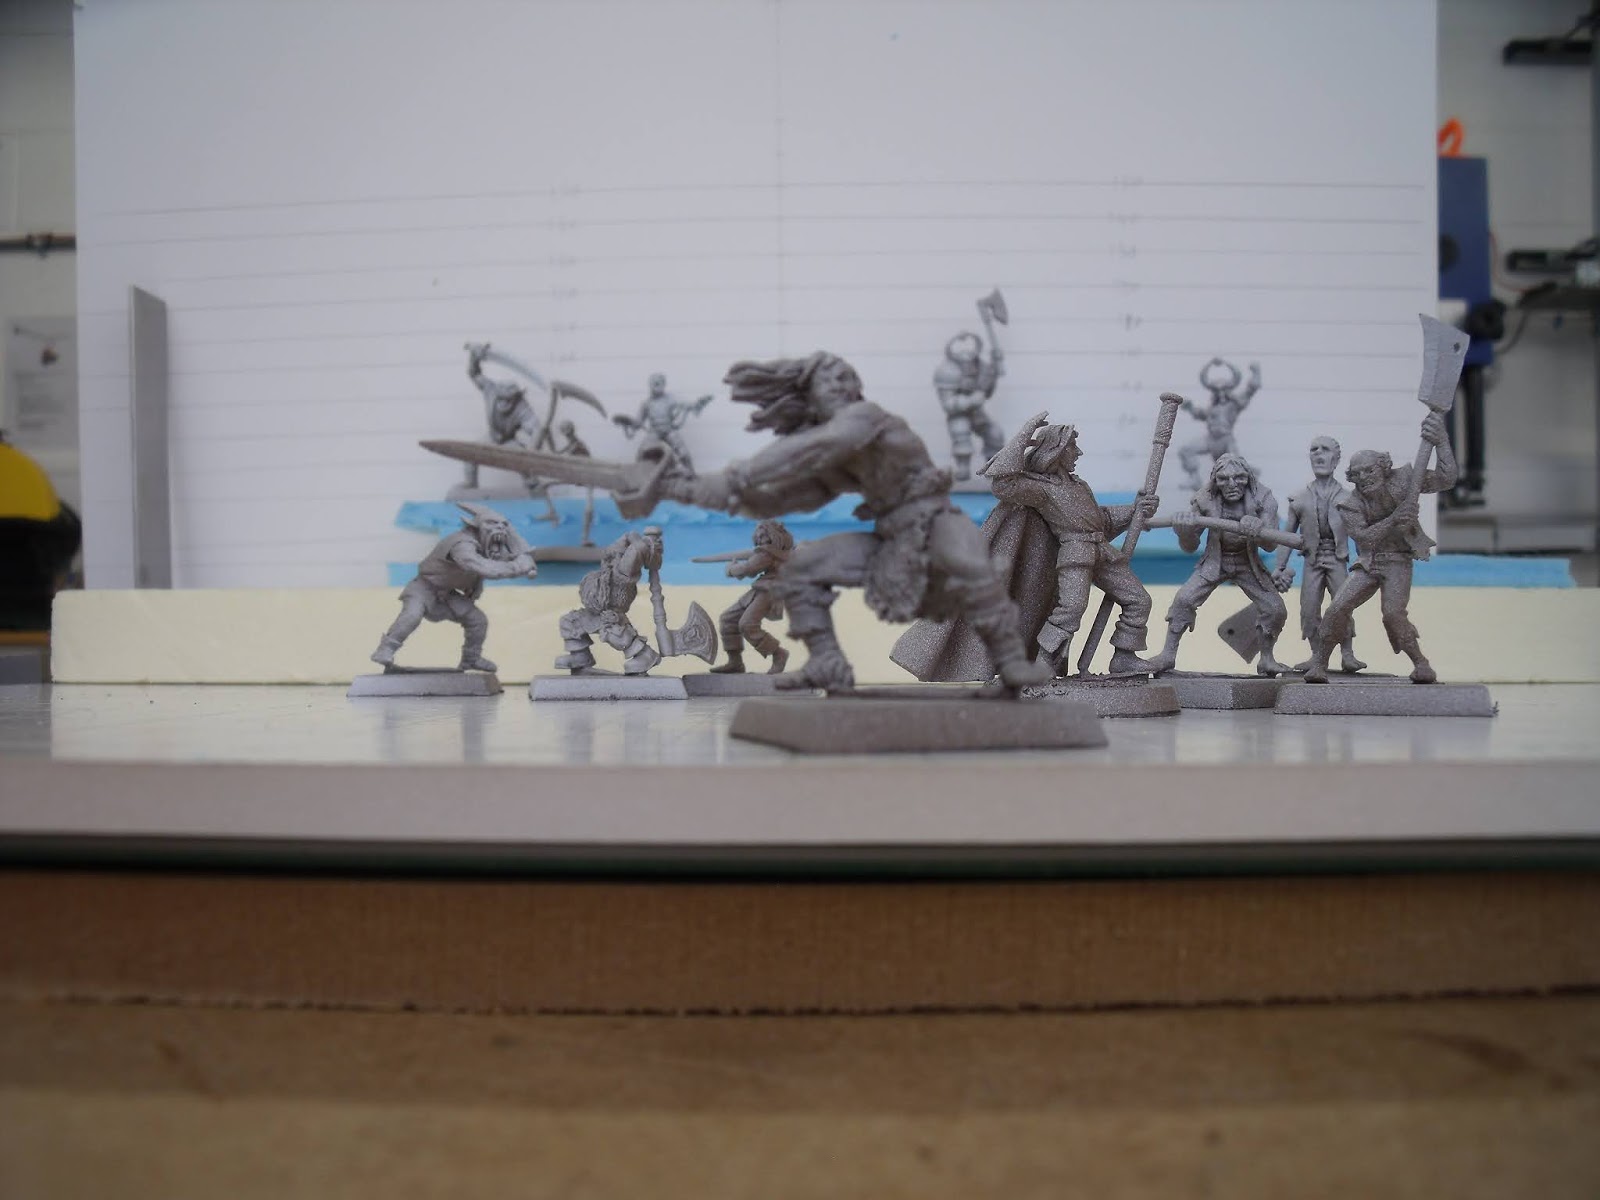
Boris' greens in front of his own version of the famous dungeon.


Stacking up some styrofoam blocks to get relative height of the staircase levels. I used my little Nikon point-and-shoot camera as the big SLR didn't have a lens that would give the right relationship between the figures. The diorama was then constructed around a particular viewpoint of that camera (90mm from the front of the base). To get the paving to replicate the artwork I had to use a forced perspective with a vanishing point in a spot that looks really odd viewed from the top! Now someone has commented that in the original Les Edwards sketches there is actually a gap between two staircases, not one long staircase. That would go some way to explain the weird perspective on the stones between the barbarian's legs. I did have Blood and Iron, the Les Edwards art book which shows this but must confess I forgot. In any case I think I would still have done one continuous staircase as that is what the 8-year-old me saw the image as and that is how the scene has been ingrained in my mind.

The staircase treads are different depths and heights to get the miniatures at the right height in relation to each other. For example in the art you can very clearly see which step the skeleton's feet are on, this had to match up with the figures around it and the sculpted length of the skeleton's own legs. Seen from the front, however, this weirdness also disappears. The base is carved in expanded polystyrene/styrofoam with card arches textured with filler. The rough texture of the stones was achieved by pressing pumice stone onto the foam.


As you can see the figures are actually quite spread out. The base was then painted black and drybrushed with Foundry acrylics to try and capture the colours on the box. The higher resolution/clearer image in Blood and Iron is actually much yellower, but again I went with the box colours as those are the ones that come to mind when I think of this image.


Not shown in this picture is the sconce I sculpted in putty then drybrushed around to give the shine. I imagine there is a second torch on the wall behind the barbarian's 80s hair but as you can't see the flame stretching up to the same level as the visible one I decided not to put one in.
The next step was to paint the figures and I did a little video on this my YouTube channel if you are interested: The Barbarian and the Brawdsword! This was a lot of fun, especially as Boris' sculpts are so accurate to the art.

Due to lockdown I wasn't able to get to the little camera I had used to plan the layout for a couple of months. The other week, however, I managed to go and pick it up so could begin to mount the miniatures in their respective positions. I had my original grid to work from (cut to fit around the stairs) and it was pretty quick assembling it with the camera, a tape measure and image. Placing the figures was a simple matter of cutting a slit with a scalpel and pushing the slotta tab in. The heroes I am not gluing in place as I want to be able to remove them to use in games of Heroquest but the rest I superglued in place once everything looked right. The fiddliest bit was fitting in the bits Boris hadn't sculpted- the two orcs coming out of the left-hand arch and the fimir and orc (?) coming out of the right-hand archway. The three in shadows I sculpted as just heads and tried to pinpoint where they would be seen correctly between in the orc, skeleton and mummy. The leftmost head ended up a bit hidden but I know it's there! The orc emerging behind the chaos sorcerer I reposed from one of the actual Heroquest orcs, I felt it was a fitting tribute to have one of the original game minis in there.


Unfortunately the poin-and-shoot camera being what it is I was unable to get sufficient depth of field for everything to be in focus at once. To be honest I doubt that would be possible even with a choice of lenses given how deep the diorama is. That meant having to shoot each layer of the diorama separately, using a piece of white card slid behind the layer currently being photographed. I then pulled these together in Photoshop. The layers don't match up exactly as I wasn't able to leave the camera completely still and manual focus between layers so the outline of each layer is a bit shinier than I'd like. Eventually I'll find a lens for my SLR that will let me take the shot better! For the moment though here is my Heroquest box art diorama with and without visual effects added. Enjoy!


FAAAAANTASTIC!!!! Absolutely amazing..... I like it 😁 That is really, really clever and wonderfully executed.
ReplyDeleteIncrível! Parabéns!
ReplyDeleteExcellent diorama and attention to detail!
ReplyDeleteCrazy job!!! Very nice
ReplyDeleteAmazing job! Fantastic idea!
ReplyDeleteStunning. Excellent concept and execution! A+!
ReplyDeleteI'm looking forward to getting my set painted up at some point. Amazing work.
ReplyDeleteFantastic
ReplyDelete